

We’ve all fallen in love with that velvety layer of cold foam crowning our favorite iced coffee drinks at cafes. The good news? You don’t need expensive equipment or barista training to create this luxurious texture at home. Cold foam transforms ordinary iced beverages into café-quality treats with just a few simple ingredients and the right technique.
This silky microfoam isn’t just about aesthetics – it adds a creamy richness that perfectly balances bold coffee flavors without the heaviness of traditional cream. Whether you’re craving a protein-packed version or a dairy-free alternative, we’ll show you multiple methods that work with whatever you’ve got in your kitchen.
Ready to elevate your morning routine? Let’s jump into the surprisingly simple industry of homemade cold foam that’ll have you skipping the coffee shop line and impressing friends with your newfound skills.
What Is Cold Foam
Cold foam is a light, airy milk topping that sits beautifully on top of iced coffee drinks without melting quickly like traditional hot steamed milk. We create this creamy layer by aerating cold milk through various methods that incorporate air bubbles to achieve its signature fluffy texture.
The foam maintains its structure longer than hot milk foam because cold temperatures help stabilize the protein structure in milk. This stability allows the foam to float on your iced beverage while slowly integrating with each sip. Unlike whipped cream which can be heavy and overpowering, cold foam provides a subtle creaminess that enhances rather than masks your coffee’s flavor profile.
Most coffee shops use specialized equipment like milk frothers or blenders to create their cold foam, but we can achieve similar results using common kitchen tools. The key lies in understanding that cold foam requires more agitation time than hot foam since cold milk proteins take longer to denature and trap air bubbles effectively.
Cold foam works with various milk types including dairy milk, oat milk, almond milk, and other plant-based alternatives. Each milk variety produces different foam characteristics based on its protein and fat content. Whole milk creates the richest and most stable foam, while plant-based milks may require additional techniques to achieve optimal results.
The versatility of cold foam extends beyond plain milk as we can infuse it with flavors like vanilla, cinnamon, or even matcha powder. This customization allows us to create signature drinks that rival those from professional coffee shops while controlling ingredients and sweetness levels to our personal preferences.


Equipment Needed

Making perfect cold foam doesn’t require specialized barista equipment or expensive gadgets. We can create cafe-quality cold foam using common kitchen tools that most home cooks already have on hand.
Essential Tools
Handheld Milk Frother
We recommend starting with a handheld milk frother as our go-to tool for creating light and airy foam. This popular and effective device whips the milk and cream mixture quickly, usually achieving perfect foam texture in under a minute.
Small Jar with Lid or Glass
A simple 8-ounce jar with a tight-fitting lid serves as our backup method when a frother isn’t available. We can shake the ingredients vigorously in this container to create the same foamy results through manual agitation.
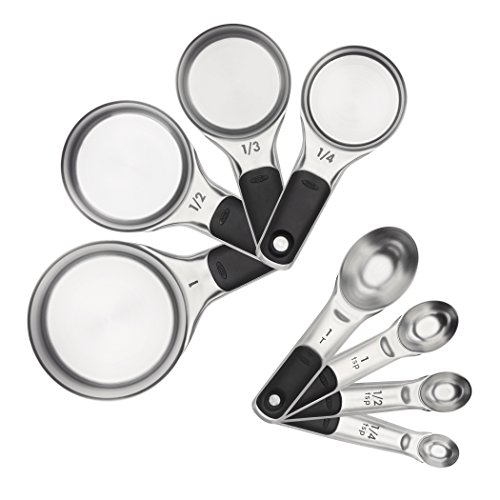
Measuring Cups and Spoons
Precise measurements make the difference between perfect foam and disappointing results. We need these basic tools to ensure our milk-to-cream ratios create the ideal foam consistency.
Small Cup or Glass
We use a small mixing cup or glass to combine our ingredients before frothing. This container should have enough room for the mixture to expand as it transforms into foam.
Alternative Equipment Options
Electric Milk Frother or Steam Wand
Professional or cafe-style results become achievable with electric frothers or steam wands. We can use these tools to create consistently smooth foam with minimal effort.
Immersion Blender
Small quantities of cold foam work well with immersion blenders, though we find this method less common among home baristas. The blender creates effective foam but requires careful handling to avoid over-mixing.
Manual Whisk
A traditional whisk delivers effective results when we put in the extra effort and time. This method requires more arm work but produces the same creamy foam texture we’re after.


Ingredients

Creating the perfect cold foam requires just a few simple ingredients that you likely already have in your kitchen. We’ll show you the essential components and exciting flavor variations to customize your foam.
Basic Cold Foam Ingredients
- Heavy Cream: 2-3 tablespoons
- Milk: 1-2 tablespoons (whole milk, 2% milk, or alternatives like almond milk)
- Vanilla Extract or Syrup: 1/4 to 1 teaspoon
- Sugar or Powdered Sugar: Optional, for sweetness
Flavor Variations
- Vanilla Sweet Cream Cold Foam: Use vanilla extract or syrup for a classic flavor that complements any coffee drink
- Sweetened Cold Foam: Add powdered sugar to taste for extra sweetness without grittiness
- Fruit Infused Cold Foam: Infuse with fruit syrups or purees for different flavors like strawberry or peach


Instructions

Now that we have our ingredients and equipment ready, let’s walk through the simple process of creating perfect cold foam at home. These straightforward steps will help us achieve that creamy, café-quality topping every time.
Prep the Milk
We start by selecting our base ingredients for the perfect cold foam mixture. For a rich and creamy version, we combine 3 tablespoons of heavy whipping cream with 2 tablespoons of whole milk and 1 tablespoon of our chosen sweetener such as sugar or syrup in a mixing bowl.
Those preferring a lighter option can use skim milk instead of heavy whipping cream. We mix 2 ounces of skim milk with ½ ounce of vanilla simple syrup for this variation. The milk should be cold from the refrigerator as this temperature helps create the most stable foam structure.
We ensure all ingredients are well incorporated before moving to the frothing stage. Room temperature ingredients won’t produce the same thick, lasting foam that cold ingredients create.
Create the Foam
We use our milk frother to transform the mixture into thick, airy foam. The frothing process requires patience as we work the mixture until it becomes noticeably thick and foamy.
For the skim milk version, we froth for approximately 20 seconds to achieve the desired consistency. The heavy cream mixture may require slightly more time due to its richer composition. We watch for the mixture to double in volume and develop a smooth, velvety texture.
Electric frothers make this process effortless, but manual methods like jar shaking work just as effectively with a bit more effort. We continue frothing until the foam holds its shape when we lift the frother from the mixture.
Check Consistency
We examine the foam’s texture to ensure it meets our quality standards. The ideal cold foam should be thick enough to float on top of our coffee while maintaining a smooth, creamy appearance.
If the foam appears too thin or watery, we continue frothing until it reaches the proper consistency. Perfect cold foam should coat the back of a spoon and hold soft peaks when we test it. The texture should feel luxurious and stable rather than bubbly or separated.
We can customize the flavor at this stage by incorporating different syrups like vanilla, hazelnut, or caramel to create unique cold foam variations. Once satisfied with the consistency, we divide the cold foam evenly among our glasses of cold brew coffee or other beverages for the perfect finishing touch.


Directions for Different Methods

We’ll explore four proven techniques for creating perfect cold foam using common kitchen equipment. Each method offers unique advantages depending on your available tools and desired foam consistency.
French Press Method
We start by pouring cold milk into our French press, filling it only halfway to allow room for expansion. The key lies in securing the lid properly and pumping the plunger up and down vigorously to introduce maximum air into the milk. This creates a dense, stable foam that holds its structure beautifully on top of iced beverages. We recommend continuing the pumping motion for 30 to 60 seconds until the milk doubles in volume and achieves that signature airy texture.
Milk Frother Method
We pour our cold milk or dairy-free alternative into a glass measuring cup for easy handling and precise measurements. Using a handheld frother, we immerse the whisk end into the milk and activate the device. The frothing process takes 2 to 3 minutes of continuous operation to reach optimal frothiness. We move the frother in gentle circular motions while maintaining steady pressure to create consistent foam throughout the milk.
Mason Jar Method
We fill a mason jar halfway with cold milk, leaving adequate space for vigorous agitation. After securing the lid tightly, we shake the jar with energetic up and down motions for 30 seconds to one minute. This method requires physical effort but produces excellent results without any specialized equipment. We check the foam consistency through the glass and continue shaking if additional aeration is needed.
Whisk Method
We place cold milk into a mixing bowl and use a balloon whisk to beat the milk manually. This technique demands considerable elbow grease but allows us complete control over the foam’s final texture. We whisk in rapid circular motions, incorporating air bubbles until the desired foam forms. The process typically takes 2 to 4 minutes of continuous whisking to achieve professional-quality results.


Flavor Variations

Transform your cold foam into a delicious treat by experimenting with these popular flavor combinations. Each variation offers a unique taste profile that complements different coffee drinks perfectly.
Vanilla Cold Foam
We love this classic flavor that pairs beautifully with any coffee drink. Combine 1 ounce of vanilla syrup (Torani works exceptionally well) with 1 ounce of heavy whipping cream and ½ ounce of milk in your frothing container. The vanilla syrup adds sweetness and aromatic depth while maintaining the foam’s stability. Froth the mixture using your preferred method until it reaches a thick and airy consistency. This variation creates a luxurious topping that mimics the popular coffee shop versions.
Cinnamon Cold Foam
Warm spice lovers will appreciate this aromatic twist on traditional cold foam. Start with our basic cold foam recipe and add a generous pinch of ground cinnamon powder before beginning the frothing process. The cinnamon integrates beautifully throughout the foam while adding a subtle warmth that complements espresso drinks particularly well. We recommend using Ceylon cinnamon for a more delicate flavor profile or regular cinnamon for a bolder spice note. This variation works wonderfully with fall and winter coffee drinks.
Sweet Cream Cold Foam
Our sweet cream version delivers the ultimate indulgent experience for coffee enthusiasts. Mix 2 tablespoons of heavy cream with ¼ cup of whole milk, ¼ teaspoon of vanilla extract, and 1 tablespoon of powdered sugar in your frothing vessel. The powdered sugar dissolves easily and creates a smooth sweetness without grittiness. While some recipes suggest using lighter milk alternatives, we find that heavy whipping cream produces the most stable and long lasting foam structure. This rich variation transforms any iced coffee into a dessert like experience.


Serving Suggestions

Cold foam transforms ordinary beverages into café-quality drinks that impress with every sip. We’ll show you the best ways to serve your homemade cold foam and create stunning presentations.
Coffee Pairings
Cold Brew stands as our top recommendation for cold foam pairings. The creamy texture complements the smooth, rich flavor of cold brew coffee perfectly. We find that the foam’s light consistency balances the bold coffee notes without overwhelming the drink’s natural characteristics.
Iced Lattes benefit tremendously from cold foam toppings. The velvety layer adds richness to your drink without watering it down like traditional ice does. We recommend using vanilla cold foam with iced lattes to enhance the coffee’s natural sweetness.
Hot Coffee creates an unexpected yet delightful pairing with cold foam. The temperature contrast provides a unique drinking experience that surprises and delights. We suggest trying this combination with medium roast coffees that won’t overpower the foam’s delicate flavor.
Iced Americanos pair beautifully with flavored cold foam varieties. The simple coffee base allows the foam’s flavors to shine through clearly. We particularly enjoy cinnamon cold foam with iced Americanos during fall months.
Presentation Tips
Layering creates the most visually striking cold foam drinks. Pour cold foam gently over your coffee using a spoon to create distinct layers that showcase both components. We recommend tilting the glass slightly and pouring slowly to achieve the best layered effect.
Garnishes elevate your cold foam drinks from simple to spectacular. Add a sprinkle of cinnamon or cocoa powder for extra visual appeal and complementary flavors. We often dust the foam surface with these spices just before serving.
Timing plays a crucial role in cold foam presentation success. Prepare the foam just before serving to ensure it retains its optimal texture and appearance. If your foam sits for a few minutes, whisk it briefly before use to restore its airy consistency.
Glassware selection impacts your cold foam’s visual presentation significantly. We prefer clear glasses that showcase the foam’s texture and any layering effects you’ve created. Tall glasses work best for dramatic layered presentations.


Storage and Make-Ahead Tips

Cold foam requires immediate attention for optimal results, but we can share strategies to help you plan ahead and maintain quality. Fresh preparation delivers the best texture and appearance, though understanding proper storage techniques extends your cold foam’s usability.
Immediate Use Recommendations
We recommend using cold foam immediately after preparation to achieve peak performance. The delicate structure begins breaking down within minutes of creation, causing the airy texture to deflate gradually. Serving within two to three minutes preserves the light, fluffy consistency that makes cold foam so appealing.
Quick Revival Techniques
When cold foam sits for several minutes, we suggest whisking it briefly before use to restore consistency. A few gentle strokes with a small whisk or frother reactivates the air bubbles and brings back the desired texture. This technique works effectively for foam that has been sitting for up to ten minutes.
Ingredient Storage Strategy
We find storing ingredients separately in the refrigerator maximizes freshness and convenience. Heavy whipping cream maintains quality for five to seven days when properly refrigerated, while milk varieties stay fresh according to their expiration dates. Vanilla syrup and extract keep well in cool, dry conditions for extended periods.
| Ingredient | Storage Location | Shelf Life |
|---|---|---|
| Heavy Whipping Cream | Refrigerator | 5-7 days |
| Milk (all types) | Refrigerator | Per expiration date |
| Vanilla Syrup | Pantry/Refrigerator | 1-2 years |
| Vanilla Extract | Pantry | Indefinite |
Preparation Timing Guidelines
We advise preparing cold foam just before serving to ensure optimal freshness and appearance. The process takes only two to three minutes, making it practical to create on demand rather than storing prepared foam. This approach guarantees your beverages receive the perfect finishing touch every time.
Equipment Maintenance
Clean frothers and mixing tools immediately after use to prevent milk residue buildup. We recommend rinsing with warm water and wiping thoroughly to maintain equipment performance for future cold foam preparation.
Troubleshooting Common Issues

Even with proper technique cold foam issues can arise during preparation. We’ll address the most common problems and provide answers to help you achieve perfect results every time.
Foam Won’t Form
Insufficient Fat Content creates the most frequent obstacle when cold foam refuses to develop. Heavy whipping cream contains the essential fat molecules needed for foam formation while regular milk lacks adequate fat content for proper structure. We recommend using cream with at least 35% fat content for optimal results.
Incorrect Equipment prevents proper air incorporation into your mixture. Milk frothers and handheld electric mixers provide the necessary agitation speed to create stable foam. Manual whisks require significantly more effort and time to achieve similar results. Steam wands work exceptionally well when you need professional quality foam.
Temperature Issues affect foam development since ingredients that are too warm struggle to hold air bubbles. Keep your heavy cream and milk refrigerated until ready to use. Room temperature ingredients create unstable foam that collapses quickly during preparation.
Foam Deflates Quickly
Over-Whipping causes foam proteins to break down and lose their ability to trap air effectively. Stop frothing immediately when the mixture reaches your desired consistency. Excessive agitation creates dense foam that separates and deflates within minutes of preparation.
Temperature Control plays a crucial role in foam stability since cold ingredients maintain structure longer than warm ones. Store all ingredients in the refrigerator and avoid leaving prepared foam at room temperature. Cold temperatures help stabilize milk proteins and extend foam life significantly.
Timing Factors influence foam longevity as freshly made cold foam performs best when used immediately. Foam naturally begins deflating within 5-10 minutes after preparation. Plan your coffee preparation to coincide with foam completion for optimal texture and appearance.
Foam Is Too Thick or Thin
Liquid Content Adjustments solve most consistency problems when your foam doesn’t meet expectations. Add small amounts of milk to thin overly thick foam or incorporate additional heavy cream to thicken watery results. Make adjustments gradually using teaspoon measurements to avoid overcorrection.
Fat Ratio Balance determines final foam texture since different milk types produce varying results. Whole milk creates lighter foam while heavy cream produces denser texture. Experiment with ratios to find your preferred consistency for different coffee drinks.
Frothing Duration directly impacts foam thickness as longer whipping times create denser results. Monitor your foam development carefully and adjust frothing time based on desired texture. Short bursts of frothing allow better control over final consistency than continuous mixing.


Conclusion
Creating perfect cold foam at home is simpler than most people think. With basic kitchen tools and the right technique you can transform your daily coffee routine into a café-quality experience.
We’ve shown you that expensive equipment isn’t necessary – whether you choose the French press method mason jar technique or simple handheld frother you’ll achieve professional results. The key lies in understanding your ingredients and being patient with the process.
Now it’s time to experiment with different flavors and find your signature cold foam recipe. Your morning coffee will never be the same and your friends will be impressed by your newfound barista skills.
Frequently Asked Questions
What is cold foam and how is it different from regular foam?
Cold foam is a light, airy milk topping made at cold temperatures that maintains its structure longer than traditional hot steamed milk. The cold temperature helps stabilize milk proteins, creating a creamy texture that enhances coffee flavors without being too heavy. Unlike hot foam, cold foam requires more agitation time to effectively trap air bubbles.
Can I make cold foam at home without expensive equipment?
Yes, you can easily make cold foam at home using common kitchen tools. A handheld milk frother works best for quick results, but you can also use a mason jar with a lid for shaking, a French press, or even a manual whisk. No specialized barista equipment is required.
What ingredients do I need to make cold foam?
The basic ingredients for cold foam include heavy cream, milk, and optional flavorings like vanilla extract or syrup. You can add sugar for sweetness or experiment with different syrups and purees for unique flavors like strawberry or peach. Both dairy and plant-based milk alternatives work well.
How long does cold foam last after making it?
Cold foam is best used immediately for optimal texture and appearance, as it begins to deflate shortly after preparation. If it sits for a few minutes, you can quickly revive it by whisking briefly to restore consistency. For best results, prepare cold foam just before serving.
What are the best methods for making cold foam at home?
The four most effective methods are: the French Press Method (pumping the plunger), Milk Frother Method (using a handheld frother), Mason Jar Method (vigorous shaking), and Whisk Method (manual whisking). Each offers unique advantages depending on your available tools and desired foam consistency.
What drinks pair best with cold foam?
Cold foam works excellently with cold brew coffee, iced lattes, iced Americanos, and even hot coffee. It transforms ordinary beverages into café-quality drinks by adding a creamy layer that complements and enhances the coffee flavors while providing visual appeal.
Why isn’t my cold foam forming properly?
Common issues include insufficient fat content in your milk, using warm ingredients, or incorrect equipment. Ensure you’re using cold milk with adequate fat content, maintain cold temperatures throughout the process, and avoid over-whipping which can cause deflation. Adjust liquid ratios as needed.
Can I add flavors to my cold foam?
Absolutely! Popular flavor variations include vanilla cold foam with vanilla extract, cinnamon cold foam with ground cinnamon, and sweet cream cold foam with powdered sugar. You can also experiment with fruit syrups, matcha powder, or other flavor extracts to create signature drinks.