
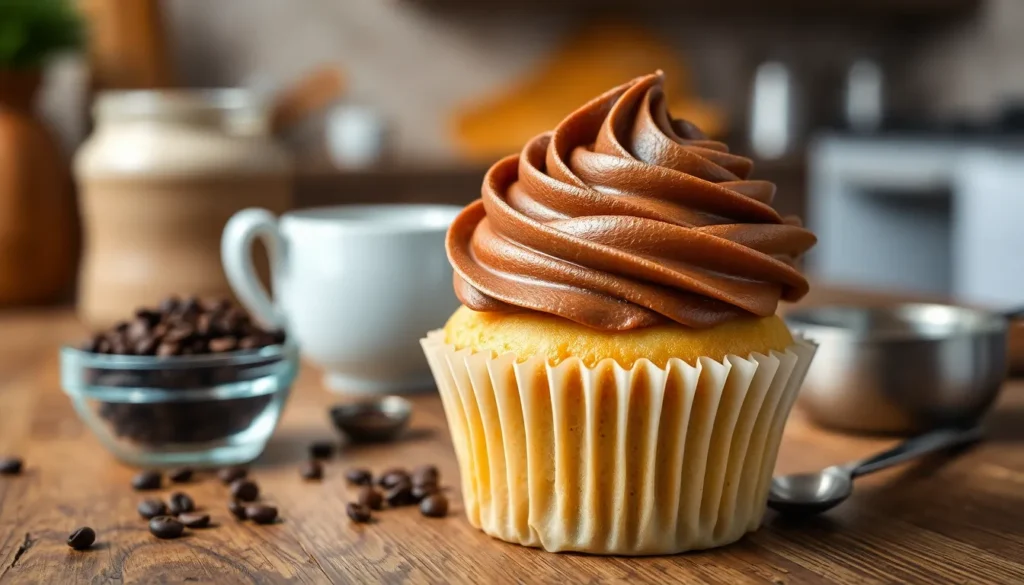
We’ve all been there – you’ve baked the perfect cake or cupcakes, but something’s missing. That’s where our rich, velvety coffee icing comes to the rescue! This isn’t just any ordinary frosting; it’s a coffee lover’s dream that transforms simple baked goods into café-worthy desserts.
Coffee icing brings together the bold, aromatic flavors of freshly brewed coffee with the smooth sweetness of buttercream. Whether you’re topping chocolate cupcakes, vanilla sheet cake, or even cinnamon rolls, this versatile frosting adds that perfect pick-me-up your desserts need. The best part? It’s incredibly easy to make with ingredients you likely already have in your kitchen.
Ingredients
This coffee icing comes together with pantry staples and a few specialty touches that create café-worthy results. We’ve organized our ingredients into two categories to streamline your preparation process.
For the Coffee Base
- 2 tablespoons instant coffee granules (or instant espresso powder)
- 3 tablespoons hot water
- 1 teaspoon vanilla extract
- 1 tablespoon heavy cream
For the Icing
- 1 cup (2 sticks) unsalted butter, softened to room temperature
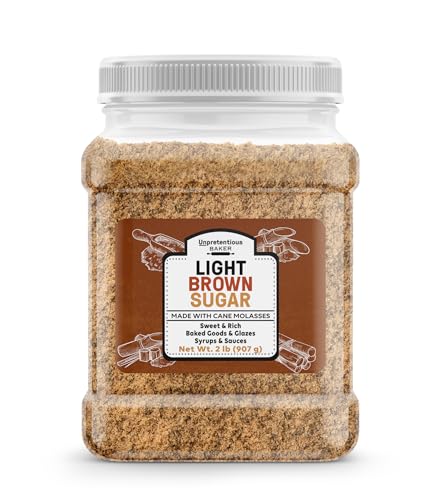
- 4 cups powdered sugar, sifted
- 1/4 teaspoon salt
- 2-3 tablespoons prepared coffee base (from above)
- Additional heavy cream as needed for consistency


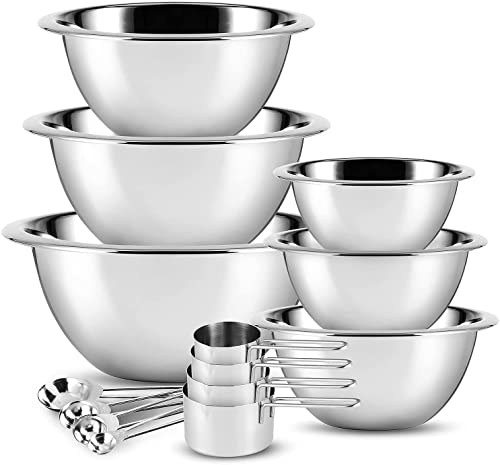
Equipment Needed
 1")
Creating our perfect coffee icing requires exact tools that ensure smooth mixing and optimal results. We recommend gathering these essential items before starting the recipe to streamline your preparation process.
Electric mixer serves as our most important tool for achieving the creamy buttercream texture that makes this icing exceptional. Stand mixers work best for consistent results, though handheld electric mixers provide adequate power for smaller batches.
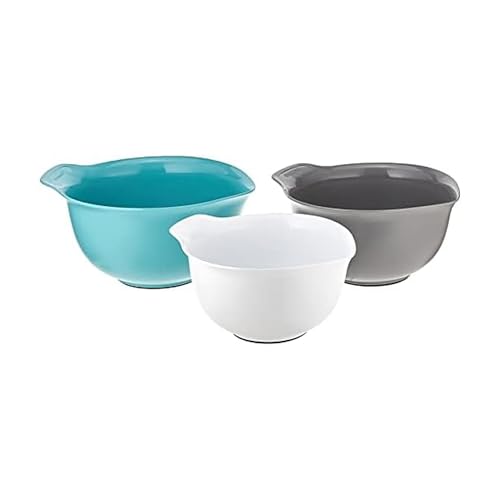
Large mixing bowl accommodates all ingredients while providing ample space for thorough mixing without spillage. We prefer bowls with at least 4-quart capacity to prevent ingredient overflow during the beating process.
Measuring cups and spoons ensure precise ingredient ratios that deliver consistent flavor and texture every time. Accurate measurements prove crucial for achieving the perfect balance between coffee intensity and sweetness.
Whisk or spatula helps incorporate ingredients manually and scrapes down bowl sides during mixing. We use these tools for final adjustments and to ensure no unmixed butter or sugar remains stuck to the bowl edges.
Additional equipment enhances the icing preparation experience. A fine-mesh strainer removes any lumps from powdered sugar before mixing. Small saucepan comes in handy for warming coffee if needed. Airtight storage containers preserve leftover icing for future use.
Room temperature ingredients mix more easily than cold ones. We recommend removing butter from refrigeration 30 minutes before starting. This simple preparation step prevents lumpy texture and reduces mixing time significantly.


Instructions
 2")
Creating this coffee icing requires careful attention to timing and temperature for the best results. We’ll walk you through each step to achieve that perfect café quality finish.
Prep the Coffee
We start by creating a concentrated coffee base that will infuse our icing with rich flavor. Combine 1 to 2 tablespoons of instant coffee granules with ½ to 1 ounce of hot water in a small bowl. Stir the mixture vigorously until the granules completely dissolve and no lumps remain. Allow this coffee concentrate to cool to room temperature while we prepare the other components. The cooling step prevents the hot liquid from melting our butter and compromising the icing texture.
Make the Icing Base
Beat the softened butter in our large mixing bowl using an electric mixer on medium speed for approximately 5 minutes. The butter should become light and fluffy with a pale yellow color. Sift 3 to 4 cups of powdered sugar to remove any lumps that could create grainy texture. Add the powdered sugar gradually to the whipped butter in three separate stages. Mix thoroughly after each addition before adding the next portion. This gradual incorporation ensures smooth blending without overwhelming the mixer.
Combine and Mix
Pour the cooled coffee concentrate into the butter and sugar mixture along with 1 teaspoon of vanilla extract and a pinch of salt. Beat the ingredients on medium speed until they combine evenly throughout the icing. The mixture should develop a uniform coffee color without any streaks of white butter or dark coffee patches. Add 2 to 3 tablespoons of heavy cream to begin achieving the desired consistency. Mix for an additional 2 minutes to ensure all components blend seamlessly.
Adjust Consistency
Evaluate the icing texture and add heavy cream one tablespoon at a time until we reach the perfect spreading consistency. The finished icing should hold its shape when piped but spread smoothly when applied with a spatula. Stop adding liquid once the icing coats the back of a spoon and maintains peaks when the mixer is lifted. Store the completed icing in the refrigerator for up to 7 days and bring it to room temperature before using for best application results.


Directions for Application
 3")
Now that we have our perfectly smooth coffee icing ready, we need to apply it properly to achieve professional-looking results. Following these application steps ensures our icing adheres beautifully and creates an even finish.
Cooling the Cake
We must ensure our cake reaches complete room temperature before applying any icing. This critical step prevents the butter-based coffee icing from melting on contact with warm surfaces. Warm cakes cause icing to slide off or create uneven patches that compromise both appearance and taste. We recommend allowing cakes to cool for at least 2 hours after removing them from the oven. Testing the bottom of the cake pan with our hand helps confirm it feels completely cool to the touch.
Applying the Icing
We begin by combining our softened butter with confectioners’ sugar in a large mixing bowl. Beat these ingredients until the mixture becomes smooth and creamy without any visible lumps. Next we add our 3 tablespoons of strong brewed coffee along with the optional teaspoon of vanilla extract. We mix thoroughly until all ingredients incorporate fully and create a uniform consistency. Using a spatula or offset spatula allows us to spread the icing evenly across the cooled cake surface. We work from the center outward to maintain control and create smooth coverage.
Finishing Touches
We achieve the smoothest finish by using a turntable to rotate our cake while spreading the icing with steady strokes. This technique helps us maintain consistent pressure and creates professional-looking results. After completing the base application we can enhance our coffee iced creation with complementary decorations. Chopped nuts or chocolate shavings make excellent additions that complement the rich coffee flavor. We press these garnishes gently into the icing surface to ensure they adhere properly and won’t fall off when serving.


Storage Instructions
 4")
Proper storage keeps our coffee icing fresh and maintains its creamy texture for future use. We recommend storing this buttercream in airtight containers to prevent it from absorbing unwanted odors and moisture from the refrigerator.
Refrigerator Storage
We store our coffee icing in the refrigerator for optimal freshness and longevity. Place the icing in an airtight container and refrigerate for up to 2 weeks. Some recipes allow storage for up to one month when properly sealed.
Before using refrigerated icing, we allow it to come to room temperature naturally. Beat the icing with an electric mixer for several minutes to restore its light and fluffy texture. This step ensures the icing spreads smoothly and maintains its professional appearance.
Room Temperature Storage
Our coffee icing remains stable at room temperature for short periods when properly covered. We can leave decorated cakes or cupcakes at room temperature for up to 2-3 days in airtight containers.
Cover the icing surface directly with plastic wrap to prevent a skin from forming. This method works particularly well for items that will be consumed within a few days.
Freezer Storage
Long term storage requires freezing our coffee icing in freezer safe containers. We can freeze the icing for up to 2-3 months without compromising quality.
Transfer frozen icing to the refrigerator to thaw overnight before use. Bring the thawed icing to room temperature and beat until smooth and creamy. This process restores the original texture and ensures even application.
Storage Best Practices
| Storage Method | Duration | Container Type | Special Instructions |
|---|---|---|---|
| Refrigerator | Up to 2 weeks | Airtight container | Beat after reaching room temperature |
| Room Temperature | 2-3 days | Airtight container | Cover surface with plastic wrap |
| Freezer | 2-3 months | Freezer safe container | Thaw overnight then beat until smooth |
Always stir or beat our coffee icing after any storage period to ensure uniform consistency. Frosted cakes benefit from proper storage as the icing helps lock in moisture and can be refrigerated for about one week or frozen for up to one month.


Variations and Tips
 5")
Building on our basic coffee icing recipe we’ve explored, let’s jump into exciting variations that will elevate your coffee icing game. These adaptations offer unique flavor profiles and techniques to suit different preferences and baking projects.
Mocha Coffee Icing
We love creating this rich chocolate-coffee fusion that adds depth and complexity to any dessert. Start with our basic coffee icing recipe and incorporate 2-3 tablespoons of unsweetened cocoa powder during the sugar mixing stage. The cocoa powder not only enhances the flavor but also deepens the color to a beautiful chocolate brown.
Beat the cocoa powder with the butter before adding the powdered sugar to ensure even distribution. We recommend sifting the cocoa powder to prevent lumps and achieve a silky smooth texture. This mocha variation pairs exceptionally well with chocolate cupcakes, vanilla cakes, and coffee-flavored desserts.
For an extra indulgent touch, we suggest adding 1 tablespoon of melted dark chocolate to the mixture once the icing reaches the desired consistency. This creates an even richer mocha flavor that coffee and chocolate lovers will adore.
Espresso Buttercream Version
When we want an intensely bold coffee flavor, we turn to instant espresso powder instead of brewed coffee. This method delivers a concentrated coffee taste without adding excess liquid to the icing.
We start with 1 cup of room temperature unsalted butter and beat it until light and fluffy. Gradually add 4 cups of sifted confectioners’ sugar, beating continuously to maintain smoothness. Dissolve 1 teaspoon of instant espresso powder in 1 tablespoon of vanilla extract, then incorporate this mixture along with 1/2 teaspoon of salt.
The key to success lies in dissolving the espresso powder completely to avoid grainy texture. We often add an extra tablespoon of heavy cream if needed to achieve the perfect piping consistency. This version creates a more stable buttercream that holds its shape beautifully for decorative piping work.
Flavor Adjustments
Fine-tuning your coffee icing requires understanding how different ingredients interact with the coffee base. We recommend starting with less coffee and gradually increasing to reach your preferred intensity level.
| Adjustment Type | Method | Result |
|---|---|---|
| Stronger Coffee Flavor | Add 1/2 teaspoon more instant coffee powder | Intensifies coffee taste |
| Balanced Sweetness | Increase confectioners’ sugar by 1/4 cup | Reduces coffee bitterness |
| Mellowed Flavor | Add extra vanilla extract | Softens harsh coffee notes |
| Creamier Texture | Increase heavy cream by 1-2 tablespoons | Improves spreadability |
We always taste the icing before final application and make adjustments accordingly. Remember that flavors intensify slightly as the icing sets, so we recommend erring on the side of subtlety during initial mixing.
For those who prefer a less sweet icing, we suggest reducing the powdered sugar by 1/2 cup and adding a pinch of salt to enhance the coffee flavor. Conversely, if the coffee taste overwhelms, gradually incorporate more confectioners’ sugar until you achieve the perfect balance.
Temperature plays a crucial role in flavor perception. We ensure our butter reaches room temperature before mixing to create the smoothest possible texture and allow flavors to meld properly.
Troubleshooting
 6")
Even experienced bakers encounter consistency issues when making coffee icing. We’ve compiled answers for the most common problems to help you achieve perfect results every time.
Too Thin
Add more powdered sugar gradually to thicken the icing. We recommend incorporating small amounts at a time until you reach the desired consistency. This method prevents over-sweetening while building structure.
Chill the icing in the refrigerator for about 10 minutes if warmth is causing the thinning. Room temperature can soften butter too much, making the icing lose its body. Cold temperatures will firm up the mixture naturally.
Beat the icing again after chilling to restore its fluffy texture. The cooling process may cause separation, but whipping will bring everything back together seamlessly.
Too Thick
Add more liquid by mixing in small amounts of water, milk, or cream to achieve proper consistency. We suggest starting with just one teaspoon at a time to avoid over-thinning. Heavy cream works best as it maintains richness while providing moisture.
Warm the icing by placing it in a slightly warm environment for a few minutes. Avoid direct heat sources that could melt the butter completely. Room temperature adjustment often resolves thickness issues caused by cold ingredients.
Check your butter temperature before mixing next time. Properly softened butter at room temperature prevents overly thick icing from the start.
Not Enough Coffee Flavor
Increase the coffee by adding more instant coffee or espresso to intensify the flavor profile. We recommend tasting as you go to prevent overwhelming the sweet balance. Start with half-teaspoon increments for best control.
Use a stronger coffee form like instant espresso powder instead of regular instant coffee for deeper flavor impact. Espresso powder provides concentrated coffee taste without adding excess liquid to your icing consistency.
Dissolve additional coffee granules in minimal hot water before incorporating them. This technique prevents grainy texture while maximizing flavor extraction from the coffee.


Make-Ahead Instructions
 7")
Coffee icing can be prepared in advance to save time during busy baking schedules. We recommend storing the finished icing in an airtight container in the refrigerator for up to 7 to 14 days to maintain optimal freshness and flavor.
Refrigeration Storage: Place the completed icing in a sealed container and refrigerate immediately after preparation. Before using refrigerated icing we need to bring it to room temperature for approximately 30 minutes. Once warmed we should mix the icing well to restore its smooth consistency and light texture.
Freezing for Long Term Storage: Our coffee icing freezes beautifully for up to 3 months when stored properly. Transfer the icing to freezer-safe containers leaving about half an inch of space at the top for expansion. Label containers with the preparation date to track storage time.
Thawing Process: When ready to use frozen icing we should thaw it overnight in the refrigerator. After thawing bring the icing to room temperature before beating it back to the desired consistency. The texture may appear slightly separated after freezing but will return to normal with proper mixing.
Best Practices: We always recommend preparing icing 1-2 days ahead of major baking projects to reduce last-minute stress. Room temperature butter mixed fresh creates the smoothest texture so we suggest allowing extra time for proper temperature adjustment before final use.


Conclusion
We’ve shown you everything you need to create café-quality coffee icing that’ll transform your homemade treats into professional-looking desserts. With basic ingredients and the right techniques you can master this versatile frosting in no time.
The beauty of this coffee icing lies in its flexibility – whether you’re making a simple vanilla cake or experimenting with mocha variations you’ll have the skills to customize flavors to your taste. Remember that proper storage and preparation techniques are key to achieving consistent results every time.
Now it’s time to put these techniques into practice. Your next batch of cupcakes or layer cake is waiting for that perfect coffee-flavored finish that’ll have everyone asking for your secret recipe.
Frequently Asked Questions
What ingredients do I need to make coffee icing?
You’ll need two main components: a coffee base (instant coffee granules, hot water, vanilla extract, and heavy cream) and the icing itself (unsalted butter, powdered sugar, salt, and the prepared coffee base). Additional heavy cream helps adjust consistency. All ingredients are commonly found in most kitchens.
How long can I store coffee icing?
Coffee icing can be stored in the refrigerator for up to 2 weeks in an airtight container. For longer storage, freeze it for 2-3 months in freezer-safe containers. At room temperature, properly covered icing stays fresh for 2-3 days. Always bring refrigerated icing to room temperature before use.
What equipment do I need to make coffee icing?
Essential equipment includes an electric mixer (preferably stand mixer), a large mixing bowl (at least 4-quart capacity), accurate measuring cups and spoons, and a whisk or spatula. Optional tools like a fine-mesh strainer and small saucepan can enhance the preparation process for smoother results.
How do I fix coffee icing that’s too thin or thick?
For thin icing, add powdered sugar gradually or chill it to restore texture. For thick icing, add small amounts of heavy cream or milk until you reach the desired consistency. Always mix thoroughly after each adjustment and taste-test before applying to your baked goods.
Can I make coffee icing ahead of time?
Yes, coffee icing can be prepared 1-2 days in advance and stored in the refrigerator for up to 7-14 days. For best results, bring it to room temperature and beat well before using to restore its light, fluffy texture. This advance preparation reduces stress during major baking projects.
What are some popular variations of coffee icing?
Popular variations include Mocha Coffee Icing (adding cocoa powder for chocolate-coffee fusion) and Espresso Buttercream (using instant espresso powder for intense flavor). You can customize coffee intensity, sweetness, and texture by adjusting ingredient ratios to match your taste preferences.
How should I apply coffee icing to cakes?
Always cool your cake completely to room temperature before applying icing to prevent melting. Use a spatula to spread evenly, and consider using a turntable for smoother application. Add decorative touches like chopped nuts or chocolate shavings for professional-looking results.
Why is my coffee icing grainy?
Grainy texture usually results from adding powdered sugar too quickly or using cold butter. Always sift powdered sugar before adding and ensure butter is at room temperature. Beat the mixture thoroughly and add powdered sugar gradually while mixing to achieve smooth, creamy consistency.