
Craving rich creamy coffee ice cream but don’t want to mess with eggs? We’ve got the perfect solution that’ll satisfy your caffeine-infused dessert dreams without any custard complications. This egg-free coffee ice cream delivers all the bold espresso flavor and luxurious texture you love – minus the fuss of tempering eggs or worrying about scrambling.
Our no-egg recipe combines heavy cream with strong coffee and just a few simple ingredients to create an incredibly smooth and scoopable treat. The best part? You’ll skip the tedious stirring over stovetop heat that traditional custard-based recipes demand. Instead we’ll show you how to achieve that perfect creamy consistency using a foolproof method that works every time.
Whether you’re avoiding eggs for dietary reasons or simply want a quicker path to homemade ice cream bliss this recipe transforms basic pantry staples into café-quality frozen perfection. Get ready to impress yourself with how easy it is to make restaurant-worthy coffee ice cream right in your own kitchen.
Ingredients
Our no-egg coffee ice cream recipe requires just a handful of simple ingredients that you likely already have in your kitchen. We’ve organized everything into clear categories to make shopping and preparation effortless.
For the Ice Cream Base
- 2 cups heavy cream
- 1 cup whole milk
- 3/4 cup granulated sugar
- 1 teaspoon vanilla extract
- 1/4 teaspoon salt
For the Coffee Flavor
- 1/2 cup strong brewed coffee, cooled completely
- 2 tablespoons instant espresso powder
- 1 tablespoon coffee liqueur (optional)
Optional Toppings and Mix-ins
- 1/2 cup mini chocolate chips
- 1/3 cup chopped chocolate-covered espresso beans
- 2 tablespoons cocoa powder for dusting
- Whipped cream for serving
- Caramel sauce drizzle
Equipment Needed
 1")
Making our egg-free coffee ice cream requires surprisingly few tools, and most of them are likely already in your kitchen. We designed this recipe to be accessible without requiring expensive specialty equipment.
Basic Mixing Equipment
A medium to large mixing bowl serves as our primary workspace for combining ingredients. We recommend using a bowl with at least 3-quart capacity to accommodate the cream mixture without overflow during whipping. An electric hand mixer or stand mixer makes the whipping process effortless, though a sturdy whisk works if you prefer manual mixing.
Measuring and Mixing Tools
Standard measuring cups and spoons ensure accurate ingredient proportions for consistent results. A rubber spatula becomes essential for folding in optional chocolate additions and scraping down bowl sides during mixing. These basic tools help us achieve the smooth, uniform texture that makes this ice cream special.
Freezing Container
Your freezer-safe container choice directly impacts the final texture and storage life of the ice cream. A loaf pan works perfectly for easy scooping and portion control, while an airtight container prevents ice crystals from forming during extended storage. We prefer containers that are 2 to 3 inches deep for optimal freezing and scooping convenience.
Optional Ice Cream Maker
While our no-churn method requires no special equipment, those with an ice cream maker can adapt this recipe easily. The machine should be pre-frozen according to manufacturer instructions, and the mixture should be chilled before processing. This equipment variation produces an even smoother texture but isn’t necessary for excellent results.
Instructions
 2")
We’ll walk you through each step to create this rich and creamy coffee ice cream that requires no eggs or complicated techniques. The process takes about 15 minutes of active time plus freezing overnight.
Prep the Coffee Mixture
Dissolve 1½ tablespoons of instant coffee granules in 1 tablespoon of hot water in a small bowl. Stir the mixture thoroughly until the coffee completely dissolves and no granules remain visible. Allow the concentrated coffee to cool for 2-3 minutes before proceeding. We recommend adding 1½ tablespoons of vanilla extract to enhance the overall flavor profile of the ice cream.
Prepare the Cream Base
Pour 2 cups of heavy cream into a large mixing bowl and whip using an electric mixer on medium-high speed. Beat the cream until stiff peaks begin to form but stop before over-whipping turns it into butter. In a separate bowl, combine 1 can of sweetened condensed milk with the cooled coffee mixture. Mix these ingredients until they’re completely incorporated and the color is uniform throughout.
Combine and Chill
Gently fold the whipped cream into the coffee and condensed milk mixture using a rubber spatula. We use a folding motion rather than stirring to preserve the airy texture that creates the creamy consistency. Work slowly and deliberately to maintain the volume we built in the whipped cream. This step is crucial for achieving the smooth texture without using an ice cream maker.
Churn the Ice Cream
Transfer the combined mixture directly into a freezer-safe container or loaf pan since this no-churn method eliminates the need for actual churning. Smooth the surface with a spatula to ensure even freezing. We can add optional mix-ins like chocolate shavings or crushed coffee beans at this stage for extra texture and flavor.
Freeze and Set
Cover the container tightly with a lid or plastic wrap to prevent ice crystals from forming on the surface. Place the ice cream in the freezer for at least 8 hours or overnight until it reaches a firm and scoopable consistency. Before serving, let the ice cream sit at room temperature for 2-3 minutes to soften slightly for easier scooping.
Directions for No-Churn Method
 3")
The no-churn method transforms our simple ingredients into creamy coffee ice cream without any special equipment. We’ll guide you through each step to achieve that perfect café-quality texture at home.
Mix the Base
We start by dissolving our instant espresso powder in 2 tablespoons of warm water until completely smooth. This concentrated coffee mixture becomes the flavor foundation for our ice cream. Add the vanilla extract to this coffee blend for enhanced depth.
Pour the heavy whipping cream into a large mixing bowl and beat with an electric mixer until thick peaks form. The cream should hold its shape when the beaters are lifted. Gradually fold in the sweetened condensed milk using gentle motions to maintain the airy texture we just created.
Slowly incorporate our cooled coffee mixture into the cream base. Beat the entire mixture until smooth and well combined. The consistency should be thick and creamy with no streaks of coffee visible throughout.
Fold and Freeze
Gently fold in any desired extras like crushed chocolate-covered espresso beans or mini chocolate chips using a rubber spatula. These additions create delightful texture contrasts in every bite. Use light folding motions to prevent deflating the whipped cream.
Transfer the mixture into a freezer-safe container such as a loaf pan or airtight container. Smooth the top with a spatula and cover tightly with plastic wrap or a lid to prevent ice crystals from forming.
Freeze the ice cream for at least 4 hours or overnight until completely firm. The longer freezing time allows the flavors to meld and the texture to reach optimal creaminess. Let the ice cream sit at room temperature for 5 minutes before scooping for the easiest serving experience.
Make-Ahead Instructions
 4")
We can prepare this coffee ice cream mixture up to 24 hours before freezing to save time on busy days. The beauty of this no-churn method lies in its flexibility for advance preparation.
Preparing the Base Ahead
Start by dissolving the instant espresso powder in warm water and allow the mixture to cool completely at room temperature. We recommend storing this coffee concentrate in the refrigerator for up to one day before using it in the recipe. The heavy cream and sweetened condensed milk can be combined and whipped together up to 4 hours in advance and kept refrigerated until ready to fold in the coffee mixture.
Storage Timeline
| Preparation Stage | Maximum Advance Time | Storage Method |
|---|---|---|
| Coffee concentrate | 24 hours | Refrigerate in covered bowl |
| Whipped cream mixture | 4 hours | Refrigerate in airtight container |
| Complete mixture | 1 day | Refrigerate before freezing |
| Frozen ice cream | 2 weeks | Freeze in airtight container |
Freezing Schedule
Once we combine all ingredients the mixture needs at least 8 hours of freezing time to reach the proper scoopable consistency. We suggest starting the freezing process the night before serving to ensure optimal texture. The ice cream will maintain its best quality for up to 2 weeks when stored in an airtight freezer-safe container.
Serving Preparation
Remove the ice cream from the freezer 5 to 10 minutes before serving to allow for easier scooping. This brief thawing period prevents the ice cream from being too hard while maintaining its creamy texture. We find that portioning individual servings into small containers during the initial freezing process makes serving even more convenient for gatherings or meal planning.
Storage Tips
 5")
We recommend storing your homemade coffee ice cream in an airtight, freezer-safe container to maintain its creamy texture and prevent ice crystals from forming. Our tests show that properly stored ice cream maintains its best quality for up to 2 weeks in the freezer.
Transfer the ice cream mixture to a shallow, wide container rather than a deep one for faster freezing and easier scooping later. We suggest using a loaf pan or rectangular container that allows the ice cream to freeze evenly throughout.
Press a piece of plastic wrap directly onto the surface of the ice cream before sealing the container. This extra barrier prevents freezer burn and maintains the rich coffee flavor we worked hard to create.
Label your container with the date you made the ice cream so you can track its freshness. We find that ice cream tastes best within the first week of preparation when the coffee flavors remain most vibrant.
Store the container in the main body of your freezer rather than the door where temperature fluctuations occur more frequently. Consistent freezing temperatures help preserve the smooth texture we achieved during preparation.
Remove the ice cream from the freezer 5 to 10 minutes before serving to allow it to soften slightly for easier scooping. We recommend portioning individual servings into smaller containers if you prefer grab-and-go options for busy days.
| Storage Aspect | Recommendation | Duration |
|---|---|---|
| Maximum Storage Time | Airtight container in freezer | Up to 2 weeks |
| Best Quality Period | Properly sealed container | First week |
| Softening Time | Room temperature before serving | 5-10 minutes |
Serving Suggestions
 6")
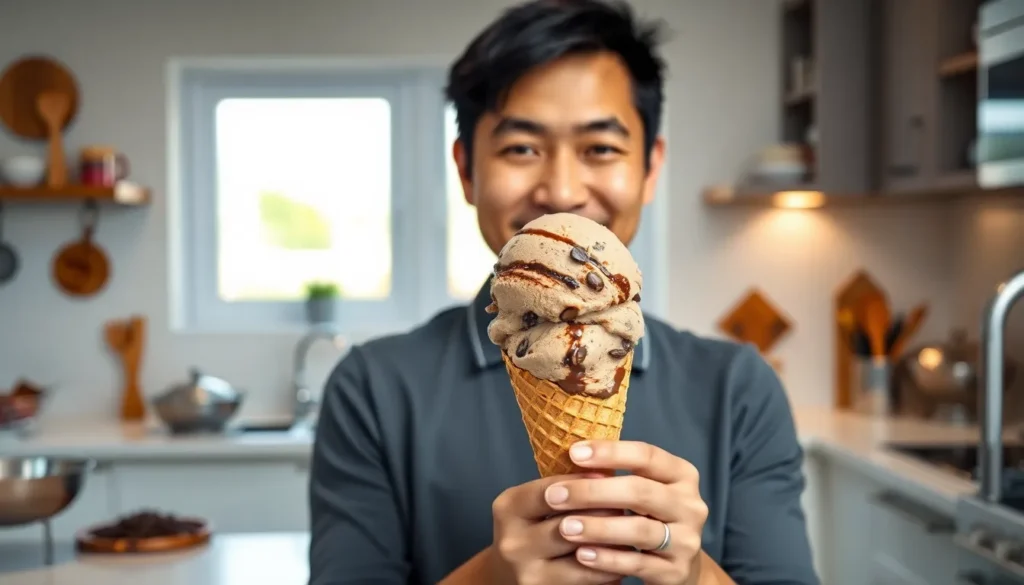
Our homemade coffee ice cream shines brightest when paired with complementary flavors and textures that enhance its rich coffee notes. We recommend serving generous scoops in chilled bowls or waffle cones to maintain the perfect temperature while adding visual appeal.
Chocolate shavings create an elegant presentation when sprinkled generously over each serving. Semi-sweet chocolate works particularly well because it balances the coffee’s boldness without overwhelming the creamy base. We find that using a vegetable peeler on a chocolate bar produces the most attractive curls and shavings.
Crushed espresso beans add both flavor intensity and delightful texture contrast. Chocolate-covered espresso beans work exceptionally well because they provide a satisfying crunch while amplifying the coffee experience. We suggest crushing them lightly to avoid pieces that are too large while still maintaining some textural interest.
Caramel sauce offers a sweet contrast that transforms our coffee ice cream into a sophisticated dessert. The smooth sweetness plays beautifully against the coffee’s natural bitterness. We drizzle warm caramel sauce just before serving to create temperature contrast and prevent the ice cream from melting too quickly.
Consider these additional pairing options to elevate your presentation:
| Topping | Flavor Profile | Texture Benefit |
|---|---|---|
| Whipped cream | Light and airy | Creamy contrast |
| Chopped almonds | Nutty sweetness | Crunchy element |
| Biscotti crumbs | Sweet and crisp | Textural interest |
| Fresh berries | Bright acidity | Color contrast |
Warm desserts pair exceptionally well with our coffee ice cream. Brownies, chocolate cake, or apple pie create temperature contrast that makes each bite more satisfying. We often serve the ice cream alongside warm desserts rather than on top to prevent rapid melting.
For coffee enthusiasts, we suggest creating an affogato by pouring a shot of hot espresso directly over a scoop of our ice cream. This Italian-inspired presentation combines hot and cold elements while intensifying the coffee flavor throughout the dessert.
Variations and Flavor Combinations
 7")
Transform our basic coffee ice cream recipe into exciting new flavors with these simple variations. Each option builds on our foundational technique while adding unique twists that coffee lovers will adore.
Mocha Coffee Ice Cream
We love creating this chocolate coffee combination by adding 4 oz of melted semi-sweet chocolate to our base mixture. Melt the chocolate gently in the microwave or double boiler and let it cool slightly before folding it into the whipped cream mixture along with the coffee concentrate. The result delivers rich chocolate undertones that complement the bold coffee flavor perfectly.
For extra texture we recommend folding in chocolate chips or chopped chocolate covered espresso beans during the final mixing stage. This creates delightful chocolate chunks throughout each scoop that provide satisfying bursts of sweetness against the coffee backdrop.
Vanilla Coffee Swirl
Create beautiful marbled ice cream by preparing a separate vanilla base alongside our coffee mixture. We make the vanilla portion using the same technique but substitute the coffee concentrate with an additional teaspoon of vanilla extract and a tablespoon of sugar.
Layer alternating spoonfuls of vanilla and coffee mixtures in your freezer container then use a knife to create gentle swirls through both flavors. This technique produces stunning visual appeal with each scoop containing both creamy vanilla and robust coffee flavors in perfect harmony.
Cold Brew Coffee Version
Substitute our strong brewed coffee with chilled cold brew concentrate for a smoother and less acidic coffee flavor profile. We use 1/2 cup of cold brew concentrate instead of the hot coffee and instant espresso combination which eliminates any bitter notes while maintaining intense coffee taste.
Cold brew creates a naturally sweeter coffee base that pairs exceptionally well with the creamy texture of our no churn method. This variation appeals to those who prefer milder coffee flavors without sacrificing the rich coffee essence that makes this ice cream so satisfying.
Troubleshooting Tips
 8")
Even with our straightforward no-churn method, occasional issues can arise when making coffee ice cream without eggs. We’ve compiled answers to the most common problems to ensure your frozen treat turns out perfectly every time.
Ice Crystal Formation
Large ice crystals often form when the freezing process happens too slowly or when air gets into the container. We recommend using a shallow, wide container rather than a deep one to promote faster freezing. Press plastic wrap directly onto the surface of your ice cream mixture before covering with a lid to prevent air exposure. Store the container in the main body of your freezer where temperatures remain most consistent.
Overly Hard Texture
When your coffee ice cream becomes rock-solid and difficult to scoop, the issue typically stems from insufficient fat content or over-freezing. Ensure you’re using heavy cream with at least 35% fat content rather than lighter alternatives. If your ice cream has already frozen too hard, let it sit at room temperature for 10 to 15 minutes before attempting to scoop.
Weak Coffee Flavor
Coffee taste can diminish during the freezing process, leaving your ice cream tasting bland. We suggest increasing the instant espresso powder to 3 tablespoons instead of the standard 2 and ½ tablespoons from our basic recipe. Cold flavors require more intensity than warm ones, so don’t hesitate to make your coffee base stronger than you think necessary.
Grainy or Lumpy Texture
Undissolved coffee granules create an unpleasant gritty texture in the finished product. Always dissolve instant coffee completely in warm water before adding it to your cream mixture. Strain the coffee mixture through a fine-mesh sieve if you notice any remaining particles. When folding ingredients together, use gentle motions to maintain the whipped cream’s structure while ensuring even distribution.
Separation Issues
Sometimes the coffee mixture and cream separate during the mixing process, creating an uneven texture. This typically occurs when the coffee mixture is too hot when added to the whipped cream. Allow your dissolved coffee to cool completely to room temperature before incorporating it. Mix ingredients gradually rather than dumping everything together at once.
Freezer Burn Prevention
White, crystalline patches on your ice cream surface indicate freezer burn, which affects both taste and texture. We recommend consuming homemade coffee ice cream within 2 weeks for optimal quality. Use airtight containers specifically designed for freezer storage, and avoid opening the container frequently, which introduces warm air and moisture.
Conclusion
Making coffee ice cream without eggs isn’t just possible—it’s surprisingly simple and delivers incredible results. We’ve shown you how to create a rich creamy dessert using basic ingredients and equipment you likely already have in your kitchen.
The no-churn method eliminates the guesswork and complexity of traditional custard bases while still producing that luxurious texture we all crave. Whether you’re avoiding eggs for dietary reasons or simply want a foolproof recipe this approach works every time.
With proper storage techniques and our troubleshooting tips you’ll have café-quality ice cream that stays fresh and scoopable. The versatility of this base recipe means you can experiment with different flavors and mix-ins to create your own signature variations.
Now it’s time to grab your whisk and start churning out this delicious treat that’s sure to impress family and friends alike.
Frequently Asked Questions
Can I make coffee ice cream without an ice cream maker?
Yes! This recipe uses the no-churn method, requiring only a mixing bowl and electric mixer. Simply whip heavy cream to stiff peaks, fold in sweetened condensed milk and cooled coffee mixture, then freeze for at least 4 hours. No special equipment needed.
How long does homemade coffee ice cream last in the freezer?
Homemade coffee ice cream maintains best quality for up to 2 weeks when stored properly in an airtight, freezer-safe container. For optimal texture and flavor, consume within the first week. Always label with the date made to track freshness.
Why is my coffee ice cream too hard to scoop?
Remove the ice cream from the freezer 5-10 minutes before serving to soften slightly. Using too little fat or freezing in a deep container can cause hardness. Store in a shallow, wide container for easier scooping and faster freezing.
Can I make this coffee ice cream ahead of time?
Absolutely! The coffee concentrate can be prepared 24 hours in advance. The complete mixture can be made and stored in the refrigerator for up to 24 hours before freezing. Start freezing the night before serving for best results.
What’s the secret to preventing ice crystals in no-churn ice cream?
Use a shallow container for faster, more even freezing. Press plastic wrap directly onto the ice cream surface before covering. Ensure your coffee mixture is completely cooled before folding into whipped cream to maintain the airy texture.
Can I substitute ingredients in this coffee ice cream recipe?
While heavy cream and sweetened condensed milk are essential for texture, you can adjust coffee strength by varying instant espresso powder amounts. Coffee liqueur is optional. Avoid substituting milk types as this affects the creamy consistency.
How do I make the coffee flavor stronger?
Increase instant espresso powder gradually, dissolving it properly in warm water first. You can also add a tablespoon of coffee liqueur or use cold brew concentrate instead of regular brewed coffee for a smoother, more intense flavor.
What’s the best way to serve coffee ice cream?
Serve in chilled bowls or waffle cones with toppings like chocolate shavings, crushed espresso beans, or caramel sauce. For coffee lovers, try making an affogato by pouring hot espresso over a scoop for an intensified coffee experience.