We’ve all experienced that moment of pure coffee bliss when sipping a perfectly crafted nitro cold brew at our favorite café. The velvety texture cascading with tiny bubbles and that incredibly smooth finish make it worth every penny. But what if we told you that creating this coffeehouse masterpiece at home is easier than you think?
Nitro cold brew isn’t just a trendy coffee drink – it’s a game-changer that transforms your regular cold brew into something extraordinary. The nitrogen infusion creates that signature creamy mouthfeel without adding any dairy while reducing the acidity that can make cold brew taste harsh.
We’re about to share the secrets that’ll help you create café-quality nitro cold brew right in your kitchen. With the right equipment and our step-by-step guide you’ll be serving up Instagram-worthy coffee that rivals your local coffee shop. Get ready to impress your friends and save money while enjoying the ultimate cold brew experience.
Equipment Needed
We need the right equipment to transform regular cold brew into that signature creamy nitro experience. The good news is that most of these tools are readily available and won’t expensive.
Nitro Cold Brew Maker Options
We have several options when it comes to creating nitrogen-infused cold brew at home. The most popular choice is a whipped cream dispenser that we can repurpose for coffee. These stainless steel dispensers work perfectly with N2O cartridges to create that cascading effect we love.
For those seeking a more dedicated approach we can invest in a home nitro cold brew system. These specialized units often include built-in taps and offer more consistent results. Some models feature rechargeable batteries while others require manual pumping action.
Budget-conscious coffee lovers can start with a simple French press method combined with a handheld milk frother. While this won’t create true nitro cold brew it produces a similar creamy texture that satisfies most cravings.
Essential Tools and Supplies
Beyond the nitrogen delivery system we need several key items to complete our setup. A quality cold brew maker or large mason jars serve as our brewing vessels. We recommend containers that hold at least 32 ounces to make the process worthwhile.
A fine mesh strainer or coffee filter becomes crucial for achieving that smooth finish. Cheesecloth works excellently as an additional filtration layer. We also need measuring cups and a kitchen scale for precise coffee-to-water ratios.
Storage plays an important role in our nitro cold brew success. Glass bottles or airtight containers preserve flavor while we wait for the nitrogen infusion process. A good funnel prevents spills during transfers between containers.
The final essential item is high-quality coarsely ground coffee beans. We recommend a burr grinder if grinding beans at home. Pre-ground coffee works but fresh grinding produces superior flavor extraction during the cold brewing process.
Ingredients

Creating exceptional nitro cold brew at home requires just a few key components that work together to deliver that signature smooth and creamy texture we all crave.
For the Cold Brew Base
- 9 ounces coarsely ground coffee
- 3.5 cups cool filtered water
For the Nitrogen Infusion
- Nitro canister or whipping siphon
- Whipped cream dispenser (optional alternative method)
For the Vanilla Sweet Cream (Optional Enhancement)
- 1/4 cup heavy cream
- 1 tablespoon vanilla syrup
- 1/2 teaspoon vanilla extract
- Pinch of salt (optional)
The foundation of our nitro cold brew starts with the perfect coffee to water ratio. We use 9 ounces of coarsely ground coffee beans paired with 3.5 cups of cool filtered water to achieve the ideal extraction strength. Quality matters significantly here since the cold brewing process highlights every nuance of your chosen beans.
Cool filtered water serves as our brewing medium and ensures clean flavors without any chlorine or mineral interference that could compromise the final taste. The coarse grind prevents over extraction during the extended steeping process while allowing optimal flavor development.
Our nitrogen infusion equipment transforms regular cold brew into that velvety textured beverage we’re after. A nitro canister or whipping siphon provides the pressurized nitrogen needed to create those signature cascading bubbles and creamy mouthfeel.
The vanilla sweet cream addition elevates our homemade nitro cold brew to café quality standards. Heavy cream provides richness while vanilla syrup and extract contribute aromatic sweetness that complements the coffee’s natural flavors perfectly. That optional pinch of salt enhances all the other flavors without making the drink taste salty.
Instructions

We’ll walk you through the complete nitro cold brew process using proven techniques that deliver café-quality results. Our method ensures you achieve that signature creamy cascade and velvety texture every time.
Making the Cold Brew Concentrate
We start by combining our coarsely ground coffee with cool filtered water in a large mason jar or cold brew maker. The optimal steeping time ranges from 12 to 24 hours at room temperature or in the refrigerator. Longer steeping creates a more robust concentrate that holds up beautifully to nitrogen infusion.
After steeping, we strain the mixture through a fine mesh strainer or coffee filter to remove all grounds. The concentrate should appear dark and rich without any sediment. We store this precious liquid in the refrigerator where it stays fresh for up to two weeks.
Charging with Nitrogen
We transfer our cold brew concentrate into a whipped cream dispenser for the nitrogen infusion process. The dispenser should be filled no more than two-thirds full to allow proper nitrogen circulation. We then insert one nitrous oxide cartridge into the dispenser following the manufacturer’s safety instructions.
Once charged, we shake the dispenser vigorously for 20 to 30 seconds to ensure complete nitrogen integration. This vigorous shaking creates the essential pressure needed for that signature nitro foam. For those using a dedicated nitro coffee maker, we transfer the concentrate to the keg, nitrogenate according to instructions, shake for 20 seconds, then allow it to rest for one hour before serving.
Serving and Dispensing
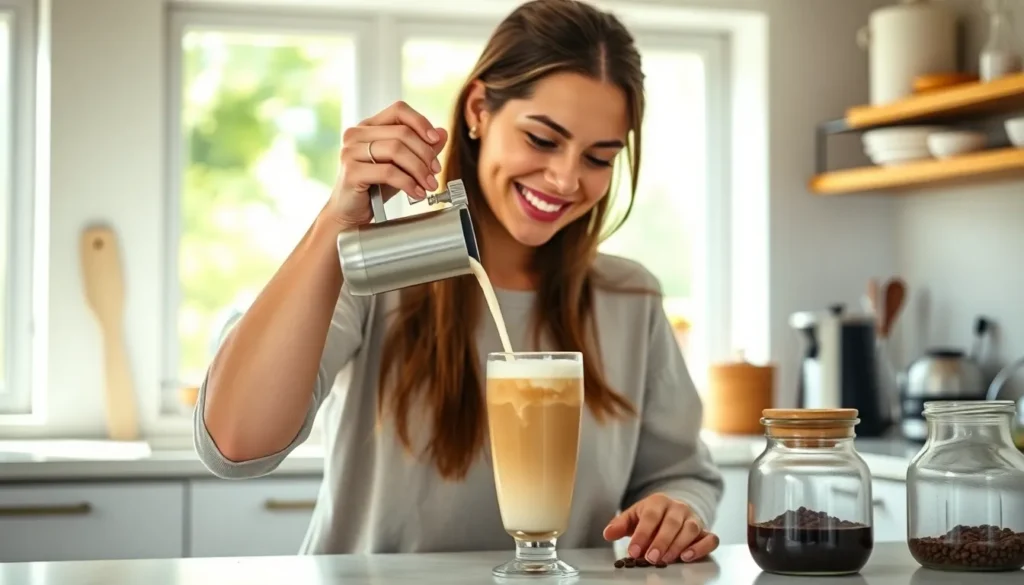
We dispense the nitro cold brew directly into a chilled glass, holding the dispenser at a 45-degree angle for optimal flow. The nitrogen creates an immediate cascading effect as tiny bubbles rise to form a creamy foam cap. We allow the drink to settle for 30 seconds to achieve the perfect foam-to-liquid ratio.
For enhanced flavor, we can top our nitro cold brew with vanilla cream cold foam. We blend heavy cream, vanilla syrup, vanilla extract, and a pinch of salt using a milk frother until frothy. This mixture gets spooned gently over the nitro cold brew, creating beautiful layers and adding luxurious texture to every sip.
Directions for Different Equipment Types

We’ll guide you through three proven methods for creating nitro cold brew at home using different equipment setups. Each approach offers unique advantages depending on your budget and commitment to the create.
Using a Whipped Cream Dispenser
Step 1: Pour your chilled cold brew concentrate into a clean whipped cream dispenser.
Step 2: Insert a nitrogen cartridge into the dispenser and secure the lid tightly.
Step 3: Shake the dispenser vigorously to properly infuse the nitrogen throughout the coffee.
Step 4: Pour the nitro cold brew into a glass and allow it to sit briefly for the foam to rise naturally.
Step 5: Add sweet cream as an optional topping to enhance the flavor profile.
Using a Nitro Cold Brew Maker
Step 1: Mix your cold brew concentrate with filtered water to achieve your desired strength.
Step 2: Transfer the diluted mixture into the maker’s keg system.
Step 3: Attach the nitrogen cartridge or tank according to your device’s exact instructions.
Step 4: Shake the keg for 20 to 30 seconds to ensure proper nitrogen infusion.
Step 5: Allow the mixture to rest for approximately one hour for optimal nitrogen absorption.
Step 6: Dispense the nitro cold brew into your glass and add cream or flavorings as desired.
Using a Keg System
Step 1: Strain your cold brew concentrate thoroughly and ensure it’s properly chilled.
Step 2: Sanitize the keg completely to prevent any contamination issues.
Step 3: Fill the keg with cold brew while leaving adequate space for gas expansion.
Step 4: Connect your nitrogen tank to the keg’s gas input valve.
Step 5: Set the pressure between 30 to 40 PSI for optimal nitrogen infusion.
Step 6: Shake the keg gently for 10 to 15 seconds to dissolve the nitrogen effectively.
Step 7: Dispense your nitro cold brew through the tap system for the perfect pour.
Storage and Make-Ahead Tips

Proper storage techniques help maintain the quality and flavor of your homemade nitro cold brew while allowing you to prepare components in advance for quick serving.
Cold Brew Storage Best Practices
We recommend storing undiluted cold brew concentrate in the refrigerator for up to two weeks. Glass containers work best for preserving flavor integrity since they don’t absorb odors or oils from the coffee. Airtight mason jars or dedicated cold brew storage containers prevent oxidation and maintain freshness throughout the storage period.
Coffee Ice Cubes for Enhanced Flavor
Making coffee ice cubes prevents dilution while keeping your drink perfectly chilled. We freeze leftover cold brew concentrate in ice cube trays for future use. These coffee cubes maintain the bold flavor profile as they melt and actually strengthen the drink rather than watering it down. Standard ice cube trays work perfectly for this purpose.
Vanilla Cream Cold Foam Preparation
Vanilla cream cold foam can be prepared several hours ahead of serving time. We whip the cream mixture and store it in the refrigerator until ready to use. This advance preparation saves time when entertaining guests or preparing multiple servings. The foam maintains its texture for approximately 4 to 6 hours when properly refrigerated.
Nitrogen Cartridge Management
Store nitrogen cartridges in a cool dry place away from direct sunlight. We keep backup cartridges on hand since each cartridge typically provides enough gas for 2 to 3 servings depending on your dispenser size. Used cartridges should be disposed of according to local recycling guidelines since they cannot be refilled.
Batch Preparation Strategies
Preparing larger batches of cold brew concentrate allows you to enjoy nitro cold brew throughout the week. We suggest making double or triple batches when time permits. Portion the concentrate into individual serving containers for convenient nitrogen infusion when cravings strike. This approach ensures consistent quality while minimizing daily preparation time.
Troubleshooting Common Issues

Even with the best preparation, nitro cold brew sometimes doesn’t turn out perfectly on the first try. We’ve compiled answers to the most common problems you might encounter while making this specialty coffee at home.
Fixing Flat Nitro Cold Brew
Check Your Nitrogen Cartridge Installation: The most frequent cause of flat nitro cold brew is an improperly installed nitrogen cartridge. We recommend removing the cartridge and reinstalling it firmly until you hear the gas release into the dispenser. Make sure the cartridge punctures completely and seals properly against the dispenser head.
Increase Shaking Time: If your cold brew lacks the signature creamy texture, you likely need to shake more vigorously. We suggest shaking the whipped cream dispenser for a full 30 seconds after installing the nitrogen cartridge. The shaking motion distributes the nitrogen evenly throughout the cold brew concentrate.
Verify Cartridge Freshness: Old or damaged nitrogen cartridges won’t create proper pressure. We always keep spare cartridges on hand and check that they’re not dented or expired. A fresh cartridge should release with a distinct hissing sound when properly installed.
Temperature Matters: Cold brew that’s too warm won’t hold nitrogen effectively. We ensure our cold brew concentrate stays refrigerated at 35-40°F before nitrogen infusion. The colder temperature helps the nitrogen dissolve more completely into the liquid.
Adjusting Texture and Foam
Control Nitrogen Pressure: Too much or too little nitrogen affects the final texture significantly. We recommend starting with one nitrogen cartridge and testing the results before adding more. Multiple cartridges can create overly aggressive foam that dissipates quickly.
Modify Shaking Technique: The way you shake the dispenser impacts foam quality. We use short, vigorous bursts rather than continuous shaking. This technique creates more stable microbubbles that produce the characteristic cascading effect.
Pour at the Right Angle: Proper pouring technique affects foam development. We hold the glass at a 45-degree angle initially, then straighten it as the glass fills. This method allows the nitrogen to create the dramatic cascade effect that makes nitro cold brew visually appealing.
Adjust Coffee Concentration: Overly strong or weak cold brew affects nitrogen retention. We maintain our 9 oz coffee to 3.5 cups water ratio for optimal nitrogen infusion. Stronger concentrates may require dilution before nitrogen infusion to achieve the perfect balance.
Let It Settle: After dispensing, we allow the nitro cold brew to sit for 15-30 seconds before serving. This brief waiting period lets the nitrogen bubbles stabilize and creates the signature creamy head that should last several minutes.
Serving Suggestions

We recommend serving nitro cold brew immediately after charging to capture the optimal foam and cascading effect that makes this beverage so visually stunning. The key to achieving the perfect pour lies in holding your glass at a 45-degree angle while dispensing the coffee slowly and steadily.
Classic Nitro Cold Brew Service
Pour the nitro cold brew into a chilled glass to maintain temperature and enhance the creamy texture. We suggest using clear glasses to showcase the mesmerizing nitrogen cascade that creates layers of foam and coffee. The visual presentation becomes part of the experience as bubbles dance upward through the rich coffee.
Vanilla Cream Cold Foam Enhancement
Top your nitro cold brew with vanilla cream cold foam for an elevated café experience. We prepare this enhancement by whipping heavy cream with vanilla syrup and vanilla extract plus a pinch of salt until the mixture reaches a frothy consistency. This addition creates a smooth and creamy texture that complements the nitrogen-infused coffee perfectly.
Temperature and Timing Considerations
Serve nitro cold brew at optimal temperature by chilling glasses in the freezer for 10 minutes before pouring. We find that the cold glass helps maintain the nitrogen bubbles longer and creates a more refreshing drink. Allow the charged dispenser to sit until it feels cold to the touch before serving to ensure maximum nitrogen retention.
Presentation Tips
Create the signature cascading effect by pouring slowly from the whipped cream dispenser or nitro maker. We recommend starting the pour at the bottom of the angled glass and gradually straightening it as the coffee fills. This technique produces the dramatic waterfall effect that makes nitro cold brew so distinctive and Instagram-worthy.
Flavor Variations
Experiment with different coffee bean origins to create unique flavor profiles in your nitro cold brew. We suggest trying single-origin beans from Ethiopia for bright fruity notes or beans from Colombia for chocolate undertones. Each origin brings distinct characteristics that become more pronounced through the nitrogen infusion process.
Conclusion
We’ve equipped you with everything needed to create exceptional nitro cold brew in your own kitchen. From simple whipped cream dispensers to professional-grade systems there’s a method that fits every budget and skill level.
The beauty of homemade nitro cold brew lies in the control you have over every element. You can experiment with different coffee origins adjust nitrogen levels and perfect your foam technique until you achieve that café-quality cascading effect we all love.
Remember that practice makes perfect. Don’t be discouraged if your first attempt doesn’t match your expectations – even professional baristas needed time to master this create. With our troubleshooting tips and storage strategies you’ll soon be serving restaurant-quality nitro cold brew that rivals any coffee shop.
Now it’s time to start brewing and enjoy the smooth creamy satisfaction of nitro cold brew whenever the craving strikes.
Frequently Asked Questions
What is nitro cold brew coffee?
Nitro cold brew is cold brew coffee infused with nitrogen gas, creating a creamy, smooth texture with reduced acidity. The nitrogen creates a cascading effect and signature foam head, similar to draft beer. This process results in a naturally sweet, rich coffee experience without the need for added dairy or sweeteners.
Can I make nitro cold brew at home without expensive equipment?
Yes! You can make nitro cold brew using a whipped cream dispenser with N2O cartridges, which is the most affordable option. Alternatively, you can create a similar creamy texture using a French press method with a handheld milk frother, though it won’t have the true nitrogen infusion.
How long does cold brew concentrate last in the refrigerator?
Cold brew concentrate can be stored in glass containers in the refrigerator for up to two weeks. For best results, keep it in an airtight container to preserve flavor. You can also make coffee ice cubes from leftover concentrate to prevent dilution when serving.
What coffee-to-water ratio should I use for nitro cold brew?
Use a 1:4 ratio of coffee to water – approximately 9 ounces of coarsely ground coffee to 3.5 cups of cool filtered water. This creates a strong concentrate that maintains its flavor when nitrogen is added and can be diluted to taste if needed.
Why is my nitro cold brew flat and lacking foam?
Flat nitro cold brew usually results from improperly installed nitrogen cartridges, insufficient shaking time, or expired cartridges. Ensure your cartridge is fresh, shake the dispenser vigorously for 30 seconds after charging, and verify the temperature is properly chilled before serving.
How do I create the signature cascading effect?
Pour your nitro cold brew into a chilled, clear glass at a 45-degree angle, allowing it to cascade down the side. Hold the glass upright and pour straight down from about 6 inches above to create the dramatic nitrogen cascade and foam head.
Can I prepare nitro cold brew components in advance?
Yes! Make cold brew concentrate in batches and store for up to two weeks. Vanilla cream cold foam can be prepared up to 6 hours ahead and refrigerated. Consider making coffee ice cubes from leftover concentrate to maintain strength when serving over ice.
What equipment do I need to get started?
Essential equipment includes a cold brew maker or large mason jars, fine mesh strainer, measuring cups, and coarsely ground coffee. For nitrogen infusion, you’ll need either a whipped cream dispenser with N2O cartridges or a dedicated nitro cold brew system.