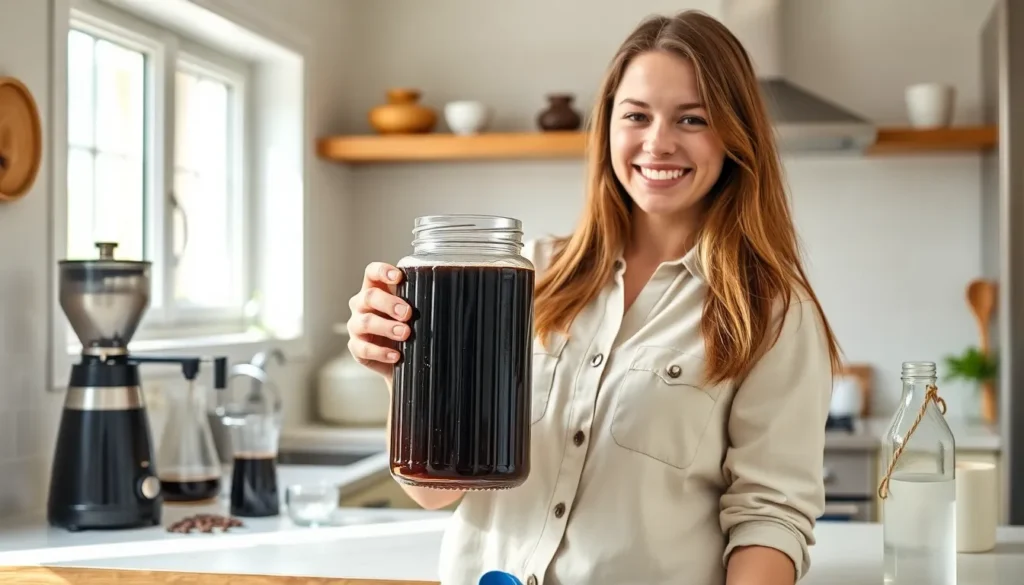
We’ve discovered that the perfect cup of cold brew coffee isn’t just a trend – it’s a game-changer that transforms your morning routine. This smooth caffeinated masterpiece originated in Japan during the 1600s and has become our go-to method for creating rich, less acidic coffee that’s gentle on the stomach yet bold in flavor.
Cold brew’s magic lies in its simplicity and patience. Unlike traditional hot brewing methods that extract bitter compounds quickly, our slow-steeping process draws out coffee’s natural sweetness and complex flavors over 12-24 hours. The result? A concentrate that’s incredibly versatile and stays fresh in your refrigerator for up to two weeks.
Whether you’re a coffee connoisseur seeking that perfect cup or someone looking to cut down on coffee shop expenses, mastering cold brew at home will revolutionize how you think about coffee. We’ll show you exactly how to create this liquid gold using just coarse coffee grounds, water, and time.
Equipment Needed
Creating exceptional cold brew coffee requires minimal equipment that most home coffee enthusiasts already possess. We recommend gathering these essential tools before beginning your brewing journey.
Large Glass Jar or Container
We prefer using a 32-ounce mason jar or glass pitcher as our primary brewing vessel. Glass containers prevent flavor contamination and allow us to monitor the brewing process visually. The wide mouth design makes adding coffee grounds and cleaning significantly easier.
Coffee Grinder
A burr grinder produces the most consistent coarse grind we need for optimal extraction. Blade grinders work adequately if you pulse in short bursts to avoid creating fine particles. We always grind our beans just before brewing to preserve maximum flavor potential.
Fine Mesh Strainer
Double straining ensures our cold brew remains smooth and sediment-free. We use a fine mesh strainer for the initial filtration step. Metal strainers work better than plastic versions because they maintain their shape under pressure.
Cheesecloth or Coffee Filters
The second filtration step requires cheesecloth or paper coffee filters to capture remaining fine particles. We layer cheesecloth in our strainer or use multiple coffee filters for crystal-clear results. This step creates the professional-quality clarity we desire.
Kitchen Scale
Measuring coffee and water by weight rather than volume produces consistent results every batch. We use a digital kitchen scale accurate to one gram for precise ratios. This tool eliminates guesswork and ensures repeatable brewing success.
Wooden Spoon or Stirrer
Gentle stirring helps saturate all coffee grounds evenly without creating excessive agitation. We avoid metal spoons that might scratch our glass containers. A wooden spoon provides the perfect tool for our initial mixing step.
Ingredients

We need just two essential ingredients to create perfect cold brew coffee concentrate in our kitchen. The simplicity of this recipe makes it accessible for any home brewer looking to create coffee shop quality results.
Coffee Requirements:
- 1½ cups coarsely ground coffee (preferably freshly ground)
- 3 cups filtered water
Optional Serving Ingredients:
- Milk or plant milk for serving
- Ice cubes
- Sweeteners (sugar, simple syrup, or honey)
Our coffee to water ratio follows a 1:2 proportion that produces a strong concentrate. We can adjust this ratio based on personal preference for a milder or stronger brew. The coarse grind size remains crucial for optimal extraction and easy straining.
We recommend using freshly ground coffee beans for the best flavor profile. Medium to dark roast beans work exceptionally well for cold brew coffee. Single origin beans showcase unique flavor characteristics while blends offer balanced complexity.
Filtered water ensures we avoid any chlorine or mineral tastes that could interfere with the coffee’s natural flavors. Room temperature water works perfectly for the steeping process.
The optional serving ingredients allow us to customize each cup according to individual preferences. Plant milk alternatives like oat milk or almond milk complement the smooth coffee concentrate beautifully. We can also prepare flavored syrups or add spices like cinnamon during the steeping process for variety.
Instructions

Creating perfect cold brew coffee concentrate requires patience and precision through each step. We’ll guide you through the simple process that transforms coarse coffee grounds into smooth, rich concentrate over time.
Prep the Coffee Grounds
We begin with whole coffee beans to ensure maximum freshness and optimal flavor extraction. Grind the beans to a coarse consistency using a burr grinder for the most consistent results. Measure 1½ cups of coarsely ground coffee, which equals approximately 80-120 grams depending on your bean density. Avoid using pre-ground coffee whenever possible since freshly ground beans deliver superior taste and aroma. The coarse grind prevents over-extraction and creates the smooth characteristic we love in cold brew.
Combine Coffee and Water
Place the coarsely ground coffee into your large glass container or Mason jar. Pour 3 cups of cold filtered water slowly over the grounds, ensuring even saturation. Our 1:2 coffee-to-water ratio creates a concentrated brew perfect for customizing strength later. Stir gently with a wooden spoon or long-handled utensil to make sure all grounds become fully saturated with water. The mixture should look like wet sand with no dry pockets of coffee visible on the surface.
Steep the Coffee
Cover your container with a lid or plastic wrap and let the coffee steep at room temperature for 12-24 hours. We recommend starting with 18 hours for a balanced flavor profile that captures the coffee’s natural sweetness without excessive bitterness. Shorter steeping times around 12 hours produce a milder concentrate, while extending to 24 hours increases extraction and creates a stronger brew. Avoid disturbing the mixture during this steeping period to allow proper extraction.
Strain the Coffee
After the steeping period ends, we need to remove all coffee grounds through careful straining. Line a fine mesh sieve with cheesecloth or use a nut milk bag for the cleanest results. Pour the coffee mixture slowly through your straining setup into a clean container, allowing gravity to do the work. Press gently on the grounds to extract remaining liquid without forcing bitter compounds through the filter. Transfer your finished concentrate to a clean glass jar and refrigerate immediately. The concentrate stays fresh in the refrigerator for up to two weeks when stored properly.
Serving Suggestions

Now that we have our cold brew concentrate ready, let’s explore the various ways to transform this rich coffee base into delicious beverages. These serving methods allow us to customize our cold brew experience to match different taste preferences and occasions.
Basic Cold Brew
We recommend starting with the classic preparation by combining equal parts cold brew concentrate with filtered water over ice. Pour ½ cup of our concentrate into a tall glass filled with ice cubes and add ½ cup of cold water. Stir gently to blend the flavors and adjust the dilution ratio based on our strength preference. For a stronger cup, we can use a 2:1 ratio of concentrate to water, while those preferring a milder taste should try a 1:2 ratio.
Iced Cold Brew Latte
Transform our concentrate into a creamy cafe-style beverage by mixing ½ cup cold brew concentrate with ½ cup of chilled milk. We can use dairy milk for traditional richness or substitute with almond, oat, or coconut milk for different flavor profiles. Fill a large glass with ice, pour in the concentrate, then slowly add the milk while stirring. The result creates a smooth, balanced latte that rivals expensive coffee shop versions at a fraction of the cost.
Cold Brew with Flavored Syrups
Enhance our cold brew experience by incorporating flavored syrups like vanilla, hazelnut, or caramel. Start with ½ cup of concentrate over ice and add 1-2 tablespoons of our chosen syrup before diluting with water or milk. Vanilla syrup complements the coffee’s natural sweetness, while hazelnut adds nutty complexity. We can also experiment with seasonal flavors like pumpkin spice in fall or peppermint during winter months for festive variations.
Storage Instructions

Proper storage ensures your cold brew concentrate maintains its rich flavor and stays fresh for weeks. We recommend storing your finished cold brew in an airtight container to prevent oxidation and preserve the coffee’s natural oils that create its smooth taste profile.
Refrigeration Guidelines
Store your cold brew coffee concentrate in the refrigerator immediately after straining. An airtight glass container or pitcher works best for maintaining optimal flavor. Your concentrate will stay fresh for up to 2 weeks when properly refrigerated at temperatures below 40°F.
| Storage Method | Duration | Container Type |
|---|---|---|
| Refrigeration | Up to 2 weeks | Airtight glass container |
| Freezing | Up to 2 months | Airtight containers or ice cube trays |
Freezing for Extended Storage
For longer storage periods, we suggest freezing your cold brew concentrate for up to 2 months. Pour the concentrate into airtight containers, leaving about half an inch of headspace to allow for expansion during freezing. Ice cube trays offer convenient portion control, allowing you to thaw only what you need for each serving.
Diluted Cold Brew Considerations
Remember that diluted cold brew has a shorter shelf life compared to the concentrate. Once you’ve mixed your concentrate with water, milk, or creamer, consume the diluted beverage within 3 to 5 days for the best taste and quality. The added ingredients introduce additional variables that can affect freshness and flavor stability.
Storage Best Practices
Keep your cold brew away from strong odors in the refrigerator, as coffee can absorb surrounding flavors. Glass containers provide the best protection against flavor contamination compared to plastic alternatives. Always use clean utensils when serving to prevent bacterial contamination and extend your cold brew’s shelf life.
Tips for the Perfect Cold Brew

We’ve found that mastering a few key techniques will transform your cold brew from good to exceptional. These essential tips focus on the three pillars of perfect cold brew: ratios, grind consistency, and timing.
Coffee-to-Water Ratio
Getting the coffee-to-water ratio right determines whether your cold brew concentrate delivers bold flavor or disappointing weakness. We recommend starting with a 1:8 ratio, which means 1 gram of coffee for every 8 grams of water, as this creates a well-balanced concentrate that’s neither too strong nor too mild.
| Brew Strength | Coffee-to-Water Ratio | Best For |
|---|---|---|
| Strong | 1:4.5 | Espresso-style concentrate |
| Standard | 1:8 | Balanced everyday drinking |
| Light | 1:11 | No dilution needed |
For those who prefer a more intense flavor, a 1:4.5 ratio produces a robust concentrate perfect for mixing with milk or cream. Lighter coffee drinkers can opt for a 1:11 ratio that eliminates the need for dilution when serving.
Grind Size Matters
The grind size directly impacts extraction speed and flavor development in your cold brew. We always use a coarse grind similar to what you’d choose for a French press, as this allows for slower extraction and prevents over-extraction that leads to bitter notes.
A medium-coarse grind works exceptionally well and should be slightly coarser than what you’d use for pour-over methods. This consistency ensures optimal water flow through the coffee grounds during the long steeping process. Using a burr grinder helps achieve the uniform particle size that’s crucial for even extraction and the best possible flavor.
Steeping Time Guidelines
Steeping time flexibility allows you to customize your cold brew’s strength and flavor profile. We typically steep our cold brew between 12 to 24 hours, with most coffee enthusiasts finding their sweet spot around 18 hours for balanced flavor development.
Shorter steeping times of 10-12 hours produce a lighter, more delicate flavor that highlights the coffee’s natural sweetness. Extended steeping up to 24 hours creates a stronger, more robust concentrate with deeper flavor notes. We recommend experimenting within this range to discover your personal preference, keeping in mind that darker roasts may need less time while lighter roasts benefit from longer extraction periods.
Conclusion
We’ve walked you through everything you need to create exceptional cold brew coffee at home. With just coarse coffee grounds filtered water and patience you’ll have a smooth concentrate that rivals any coffee shop version.
The beauty of cold brew lies in its simplicity and versatility. Whether you prefer it strong over ice or creamy as a latte the concentrate adapts to your taste preferences while staying fresh for up to two weeks.
Now it’s time to start your cold brew journey. Experiment with different ratios steeping times and flavor additions to discover your perfect cup. Your wallet and taste buds will thank you for making this delicious switch to homemade cold brew.
Frequently Asked Questions
What is cold brew coffee and how is it different from regular coffee?
Cold brew coffee is made by steeping coarsely ground coffee beans in cold or room temperature water for 12-24 hours. Unlike regular hot coffee, cold brew produces a concentrate that’s naturally sweeter, less acidic, and has more complex flavors due to the slow extraction process.
How long does cold brew coffee take to make?
Cold brew coffee requires 12-24 hours of steeping time, with 18 hours being the ideal duration for balanced flavor. While this seems long, most of the time is passive steeping, requiring minimal hands-on effort from you.
What equipment do I need to make cold brew at home?
You’ll need a large glass jar or container, a burr grinder for consistent coarse grinding, a fine mesh sieve, cheesecloth or nut milk bag for straining, and measuring tools. These basic items are sufficient to create excellent cold brew concentrate at home.
What’s the best coffee-to-water ratio for cold brew?
The standard ratio is 1:2 (coffee to water) for concentrate, using 1½ cups coarsely ground coffee to 3 cups filtered water. For serving, dilute with equal parts water or milk. Adjust ratios based on your strength preference.
How long does cold brew concentrate last in the refrigerator?
Cold brew concentrate stays fresh in the refrigerator for up to two weeks when stored in an airtight glass container. For longer storage, freeze it for up to two months. Diluted cold brew should be consumed within 3-5 days.
What grind size should I use for cold brew coffee?
Always use a coarse grind for cold brew, similar to breadcrumbs or sea salt texture. A coarse grind prevents over-extraction and makes straining easier, resulting in a smoother, less bitter concentrate with optimal flavor extraction.
Can I customize my cold brew with different flavors?
Yes! Add flavored syrups like vanilla or hazelnut during serving, or experiment with spices during the steeping process. You can also use different milk alternatives like almond or oat milk to create personalized cold brew lattes.
Why should I use filtered water for cold brew?
Filtered water removes impurities and unwanted tastes that could affect your cold brew’s flavor. Since water makes up the majority of your cold brew, using clean, filtered water ensures the best possible taste and prevents off-flavors.